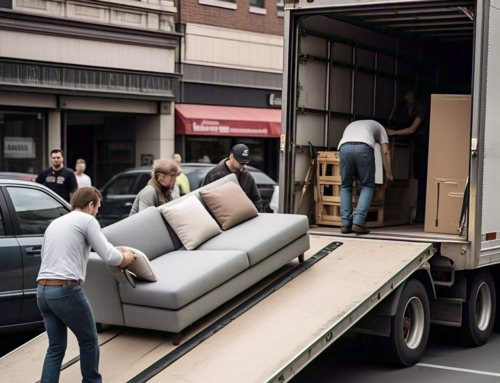

 Moving across long distances amplifies the complexity of every task, and cleaning is no exception. As you pack your belongings and prepare for the haul, the last thing you want is to leave behind a mess that could complicate your departure. Move-out cleaning is more than a gesture of goodwill—it’s a strategic move that safeguards your finances and reputation. Landlords and property managers often inspect homes meticulously, and a spotless space can mean the difference between a full deposit refund and unexpected deductions. For homeowners selling their property, a pristine condition can boost buyer appeal and even influence the final sale price.
So, where do you begin? Start with decluttering, a step that dovetails neatly with packing. Sort through your items ruthlessly—donate, sell, or discard anything you won’t take with you. This not only lightens your moving load but also clears the way for a deeper clean. Once the excess is gone, focus on high-traffic areas: kitchens and bathrooms. These spaces demand extra attention because grime builds up fast. degrease stovetops, scrub sinks, and tackle tile grout with a vengeance. Pros recommend using a mix of vinegar and baking soda for stubborn stains—it’s cheap, effective, and eco-friendly.
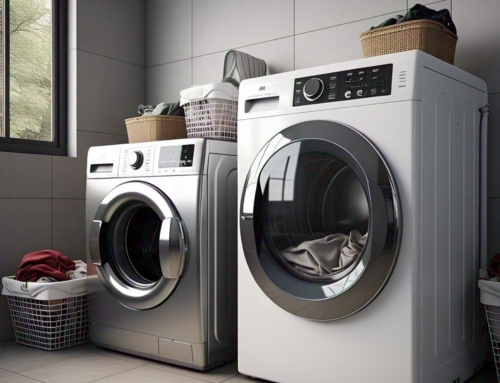
Don’t neglect the details that others might notice. Wipe down baseboards, dust ceiling fans, and clean inside appliances like ovens and refrigerators. If you’re pressed for time, prioritize what’s visible—sparkling windows and swept floors leave a strong impression. For carpets, consider renting a steam cleaner or hiring a service; pet hair and odors can linger longer than you think. And if you’re juggling a tight moving timeline, break the job into chunks: one room per day keeps burnout at bay.
Efficiency is key, so gather your supplies beforehand—brooms, mops, microfiber cloths, and all-purpose cleaners. Label boxes as you pack to avoid confusion later, and keep cleaning tools accessible until the last minute. Some movers even suggest cleaning as you go; wipe down surfaces right after clearing them. This method saves time and prevents a frantic last-day rush.
Beyond practicality, there’s a psychological perk to move-out cleaning. Walking away from a polished home feels like a clean break, letting you focus on the excitement of what’s ahead. It’s closure in action—proof you’ve handled the chaos of relocation with grace. Plus, if you’re passing the keys to renters or buyers, your effort might earn you goodwill, recommendations, or even a glowing review.
Not convinced it’s worth the effort? Consider the alternative: hiring a cleaning crew. For long-distance moves, this can be a lifesaver, especially if you’re crisscrossing time zones or managing kids and pets. Research local services at your origin point, book early, and confirm they cover move-out specifics like wall scuffs and cabinet interiors. Costs vary, but the average runs $200-$400 depending on home size—a small price for sanity.
Ultimately, move-out cleaning is your ticket to a stress-free exit. It’s the bridge between your past home and future possibilities, ensuring you leave nothing unfinished. With our expert-backed plan, you’ll conquer this task with confidence, turning a logistical hurdle into a triumph. So, grab your gloves and let’s make your old place shine—your new adventure deserves a fresh start.
The Nitty-Gritty of Move-Out Cleaning: A Room-by-Room Approach
To make move-out cleaning manageable, break it down by room and prioritize based on use and visibility. Each space has its own challenges, but with a systematic approach, you can tackle them efficiently. Let’s dive into the specifics, drawing from expert insights and practical know-how to ensure nothing gets missed.
Kitchen: The Heart of the Clean
Kitchens are often the messiest rooms, thanks to grease, spills, and forgotten crumbs. Start by emptying cabinets and drawers as you pack—wipe down interiors with a damp cloth and mild detergent to remove dust and sticky residue. Next, hit the appliances. Degrease the stovetop and oven with a heavy-duty cleaner; for baked-on gunk, a paste of baking soda and water works wonders if left to sit for 15 minutes before scrubbing. Don’t skip the refrigerator—clear out shelves, toss expired condiments, and clean with a vinegar solution to banish odors. Finish with the sink: a steel wool pad can tackle hard water stains, and a quick swipe of the faucet keeps it gleaming. Floors come last—sweep, then mop with a solution suited to your surface type. A sparkling kitchen signals diligence to anyone inspecting.
Bathrooms: Scrub Away the Grime
Bathrooms demand elbow grease because mildew and soap scum don’t surrender easily. Start with the shower and tub: use a tile cleaner or a vinegar-soaked rag for grout, and don’t forget the glass doors—squeegee them for a streak-free shine. Toilets need a full treatment—brush the bowl with a disinfectant, then wipe the tank and base. Sinks and countertops should be scoured, with special attention to toothpaste splatter and hair. Mirrors deserve a polish with glass cleaner, and if you’ve got a vent fan, vacuum the dust off its cover. Mop the floor last, ensuring corners are free of hairballs. A pristine bathroom is non-negotiable—it’s a dealbreaker for many landlords and buyers.
Living Areas: The Visible Vibe
Living rooms, dining areas, and hallways set the tone for the whole house. Vacuum carpets thoroughly or steam-clean if they’re stained; for hardwood or tile, sweep and mop with a gentle cleaner. Dust blinds, ceiling fans, and light fixtures—cobwebs in corners are a giveaway of neglect. Wipe down baseboards and window sills; smudges here are more noticeable than you’d think. If you’re leaving furniture marks on the carpet, a quick rub with an ice cube can lift the fibers. These spaces are about first impressions, so make them count.
Bedrooms: A Personal Touch
Bedrooms might feel less critical, but they’re still part of the package. Strip beds and pack linens, then vacuum or sweep under where the furniture sat—dust bunnies love those spots. Clean closet shelves and wipe down doors; if mirrored, treat them like bathroom glass. Check walls for scuffs—magic erasers can handle light marks without damaging paint. Windows here matter too; a quick wash inside and out (if accessible) boosts natural light and appeal. A tidy bedroom feels welcoming, even when empty.
The Final Sweep: Details That Seal the Deal
Once rooms are done, do a walkthrough. Test light switches and outlets for grime, clean them with a damp cloth if needed. Empty trash cans and take bags with you—leaving garbage is a rookie mistake. If you’ve got a garage or outdoor area, sweep it out; cobwebs and leaves detract from the overall vibe. Lock up and leave keys as agreed—your exit should be as smooth as your cleaning.
Pro Tips for Long-Distance Movers
Timing is everything in a long-distance move, so plan your cleaning around your schedule. If you’re driving a moving truck across states, clean a day or two before departure to avoid exhaustion. Flying overseas? Finish major tasks early and hire pros for the final polish if jet lag looms. Keep a cleaning kit in your car—paper towels, a multi-surface spray, and a broom can handle last-minute touch-ups after movers leave. Label it “Essentials” so it’s not buried in a box.
For those stretched thin, outsourcing makes sense. Professional cleaners know landlord checklists and buyer pet peeves, saving you guesswork. Get quotes from three services, check reviews, and confirm they do move-out specifics like oven interiors and carpet shampooing. Schedule them for the day after you’re out but before the handover—timing matters.
The Bigger Picture: Why It’s Worth It
Beyond deposits and impressions, move-out cleaning ties into the ethos of long-distance moving: intentionality. You’re not just relocating stuff—you’re curating a life. A clean slate at your old place mirrors the fresh one you’re chasing. It’s practical, yes, but also symbolic—proof you’re ready for what’s next. Data backs this up: a 2022 survey by the American Cleaning Institute found 68% of people felt less stressed after tidying before a move. That’s not just coincidence; it’s science.
So, as you load the truck or board the plane, let move-out cleaning be your victory lap. It’s the last hurdle before the open road, the final checkbox on a journey well-handled. With these strategies, you’ll leave behind a space that shines—and step into your new chapter with confidence.
Building Your Move-Out Cleaning Blueprint
A well-executed move-out cleaning hinges on preparation, especially when you’re facing the complexity of a long-distance move. The chaos of packing boxes, coordinating movers, and managing travel logistics can easily derail your cleaning efforts if you don’t have a strategy. Let’s expand on how to craft a plan that works, with practical steps and insider tips to keep you ahead of the game.
Step 1: Craft a Checklist That Leaves No Corner Untouched
 Your checklist is your roadmap—without it, you’re navigating blind. Start by dividing your home into zones: kitchen, bathrooms, bedrooms, living areas, and outdoor spaces like garages or patios if applicable. Then, get granular. For the kitchen, list “degrease stovetop,” “empty and wipe pantry,” and “clean under sink.” In bathrooms, add “scrub showerhead,” “polish faucets,” and “sweep behind toilet.” Don’t overlook the small stuff—dusting blinds, wiping outlet covers, and cleaning inside windows can make or break an inspection.
If you’re short on time, prioritize what’s visible and contractual. Landlords often have specific requirements in lease agreements—check yours for must-dos like carpet cleaning or wall touch-ups. Online resources can help: a quick search for “move-out cleaning checklist PDF” yields downloadable templates from sites like Apartment Therapy or The Spruce. Tweak them to fit your space—add “sweep fireplace” if you’ve got one, or “clean garage floor” for suburban homes. Keep the list on your phone or taped to a wall where you’ll see it. Crossing off tasks builds momentum, turning a mountain into molehills.
Step 2: Time It Right—Work Smarter, Not Harder
Long-distance moves come with hard deadlines—truck pickups, flight departures, or key handovers—so your cleaning timeline needs to mesh with your travel plans. Got a week before the movers arrive? Spread the load: Day 1 for decluttering, Days 2-3 for deep-cleaning kitchens and bathrooms, Days 4-5 for bedrooms and living spaces, and Day 6 for a final sweep. Moving in 48 hours? Hit the big guns first—kitchens and bathrooms take the most effort but yield the highest return for deposit recovery. Leave low-effort tasks like dusting or vacuuming for the last day.
Build in a cushion—life happens. A spilled coffee or a late mover can throw you off, so plan for an extra half-day if possible. If you’re driving cross-country, clean before you load the truck to avoid backtracking. Flying out? Finish major tasks a day early and save light touch-ups for the morning of departure. Pro movers suggest cleaning as you pack—wipe shelves as you empty them, mop floors after furniture’s gone. This “clean-as-you-go” trick cuts your workload by half when the final push arrives.
Step 3: Arm Yourself With the Right Tools
Your cleaning arsenal can make or break your efficiency. Stock up on basics: an all-purpose cleaner for versatility, microfiber cloths for streak-free wiping, a vacuum for carpets and corners, a mop for hard floors, and heavy-duty trash bags for debris. Then, add specialty weapons—glass cleaner for mirrors and windows, oven cleaner for baked-on grease, and a grout brush for tile. Don’t bother with dollar-store knockoffs; flimsy sponges and weak sprays slow you down. Brands like Method or Mrs. Meyer’s get rave reviews for power and pleasant scents—search “best cleaning supplies for moving” on X or Google for crowd-sourced winners.
Pack a dedicated “cleaning kit” box and label it boldly—burying your broom in a sea of cardboard is a rookie move. Keep it accessible until the last box is loaded. Toss in extras like rubber gloves, a scrub sponge, and a small bucket for spot jobs. If you’re eco-minded, vinegar and baking soda can sub for harsher chemicals—just don’t expect miracles on decade-old stains. Test tools on a small area first if you’re unsure; bleach on a colorful countertop is a costly oops.
Step 4: Execute With Precision and Adapt as Needed
With your checklist, timeline, and supplies locked in, it’s go time. Start with decluttering—purge junk as you pack to clear the decks. Then, work top-to-bottom and room-by-room to avoid re-dirtying clean spots. Dust ceiling fans before vacuuming floors; scrub counters before mopping. If surprises pop up—a hidden stain or a sticky drawer—adjust on the fly. Can’t finish the garage? Sweep it and call it good. Exhausted? Delegate to a partner or hire a local cleaner for the heavy lifting.
For long-distance movers, flexibility is key. If you’re handing off keys remotely, arrange for a friend or service to do a final once-over after you’re gone. Search X for “move-out cleaning hacks” to find time-savers like using a dryer sheet on baseboards or a sock over your hand for blinds. These small wins add up.
The Payoff: A Plan That Delivers
A solid plan doesn’t just get the job done—it saves you stress and cash. Experts estimate preparation shaves 30-40% off cleaning time, leaving you energy for unpacking at your new digs. At The Back Saver Movers Blog, we’ve seen panicked movers transform into cool-headed pros with this approach. Your old home will gleam, your deposit will (hopefully) return, and you’ll roll into your next chapter with a win under your belt. So, grab that checklist, set that timer, and conquer the clean—your long-distance adventure deserves a spotless launch.
Declutter Like a Pro: Your Pre-Cleaning Power Move
Decluttering isn’t just a prelude to move-out cleaning—it’s the foundation that makes everything else click. When you’re prepping for a long-distance move, every item you keep adds weight, cost, and complexity to your journey. By stripping your space down to the essentials, you’re not only making cleaning a breeze but also setting yourself up for a lighter, smoother relocation. Here’s how to master the art of decluttering with purpose and precision.
Step 1: Sort With Ruthless Efficiency
The key to decluttering is decisive sorting. Grab some bins or bags and label them: Keep, Donate, Discard. The Keep pile is for must-haves—think furniture that fits your new space, clothes you actually wear, and kitchen gear you can’t live without. Be brutal—sentimental value doesn’t justify hauling a broken lamp 1,000 miles. The Donate pile is for anything functional you won’t take: gently used coats, extra dishes, that chair you never sit in. A quick search for “donation centers near me” on your phone or X can pinpoint drop-off spots—Goodwill, Salvation Army, or local shelters often take walk-ins. Discard is for the irredeemable—cracked plates, torn rugs, or that stack of takeout menus from 2019. If you’re drowning in junk, rent a small dumpster or book a curbside pickup; many cities offer bulk trash days if you time it right.
Step 2: Conquer Room by Room
Don’t try to declutter your whole home in one chaotic swoop—focus beats frenzy. Start with clutter magnets: bedrooms, where closets hide years of impulse buys; garages, stuffed with rusty tools and forgotten sports gear; or kitchens, with their drawers of mystery gadgets. Clear one surface at a time—nightstands, countertops, shelves—then dive into storage zones like cabinets and under beds. Emptying a space reveals what’s worth keeping and what’s just dust bait. For long-distance moves, less is more—every box you skip saves you money on fuel or shipping. Work methodically: 30 minutes in the bedroom today, an hour in the garage tomorrow. This pace prevents overwhelm and keeps you sane.
Step 3: Reap the Rewards
Decluttering pays off in spades. First, it turbocharges your cleaning—fewer knickknacks mean fewer surfaces to wipe, and open floors vacuum in half the time. Pros estimate it can slash your scrubbing hours by up to 50%, leaving you energy for the road ahead. Second, it lightens your load—fewer boxes mean lower moving costs, whether you’re renting a truck or hiring pros. A cross-country haul at $1 per pound adds up fast; ditch that old printer and save $20. Third, it’s a mental reset—shedding excess feels like shedding stress. Studies link clutter to anxiety, so purging before a big move can calm your nerves when you need it most.
Step 4: Make It Sustainable and Strategic
Long-distance moving is your golden ticket to a fresh start, so don’t waste it dragging dead weight. Toss expired spices, recycle old papers, and finally part with those jeans that haven’t fit since college. Donating keeps usable goods out of landfills—check X for local drives or freecycle groups snapping up freebies. If you’re tight on time, focus on high-impact zones: a clear kitchen impresses landlords, a tidy garage boosts curb appeal for buyers. Can’t decide? Ask: “Would I pay to move this?” If the answer’s no, let it go.
The Back Saver Movers Edge
At The Back Saver Movers Blog, we’ve watched movers kick themselves for schlepping junk across state lines—don’t join that club. Decluttering isn’t just practical; it’s liberating. A streamlined space cuts cleaning time, trims your moving bill, and sets a crisp tone for your move-out. Tackle it early—one room a day—and watch the chaos melt away. By the time you grab the mop, you’ll be working with a blank canvas, ready to shine for the next chapter. Declutter first, clean smart, and roll into your new home unburdened—your long-distance trek deserves that win.
Mastering the Top-to-Bottom Cleaning Strategy
When you’re gearing up for a long-distance move, efficiency is your best friend—and a top-to-bottom cleaning strategy is the ultimate time-saver. This method isn’t just logical; it’s a proven tactic that pros rely on to maximize results with minimal backtracking. By working with gravity instead of fighting it, you’ll breeze through your move-out cleaning and leave your old place spotless. Let’s break it down with practical steps and insider tips to make this approach work for you.
Step 1: Start at the Top—Knock Down the Dust
Begin with the highest points in each room—ceiling fans, light fixtures, and air vents are dust magnets that shed debris as soon as you touch them. Grab an extendable duster (a $10 tool worth its weight in gold) to reach blades and bulbs without teetering on a chair. For stubborn buildup, wrap a microfiber cloth around the duster and swipe gently—dry for dust, damp for grease. Don’t skip crown molding, high shelves, or even the tops of door frames; these overlooked spots scream neglect to eagle-eyed landlords. Shake out the duster outside between rooms to keep messes contained. Starting high ensures that anything dislodged falls to lower levels you’ll tackle next—no double work required.
Step 2: Hit the Mid-Level—Polish the Core
Once the ceiling’s clear, move to mid-level surfaces where daily life leaves its mark. Wipe down furniture like dressers or cabinets if they’re staying, using a damp cloth with a splash of all-purpose cleaner for sticky fingerprints or coffee rings. Appliances need love too—degrease stovetops and polish fridge handles with a microfiber cloth for a streak-free finish. Windowsills and frames are mid-tier musts; dust them first, then wipe with a vinegar-water mix (1:1 ratio) for clarity—more on deep window cleaning later. This layer is about erasing signs of wear, so take your time on visible surfaces. Check your checklist here; missing a countertop can undo your momentum.
Step 3: Finish Low—Ground Your Efforts
The floor is your final frontier, and timing it last keeps it pristine. For carpets, vacuum slowly—hit edges and corners where pet hair and crumbs hide, and use the crevice tool under baseboards. If stains linger, a quick spot-treat with a carpet cleaner (search “best portable carpet cleaners” for renters’ faves) can save your deposit. Hardwoods or tile? Sweep first, then mop with a cleaner matched to the surface—check the manufacturer’s site or X for recs (e.g., Bona for wood, Rejuvenate for tile). Baseboards come last—crouch down and wipe with a damp cloth; a dryer sheet can zap dust and leave a fresh scent. Low-level grime is a sneaky deduction trigger, so don’t skimp.
Why It Works—and How to Nail It
The top-to-bottom logic is simple: gravity rules. Dust from a fan settles on a table; crumbs from a table hit the floor. Cleaning floors first is a rookie trap—you’ll just sweep twice. Pros at The Back Saver Movers Blog swear by this for long-distance moves when time’s tight and stakes are high. Pair it with a room-by-room plan—finish the kitchen top-down, then the bedroom—to stay sane. Keep tools handy: a bucket with your duster, cloths, and cleaners cuts trips to the supply stash. If you’re racing a moving truck deadline, focus on high-traffic rooms first—kitchens and bathrooms outweigh a guest room in impact.
Bonus Tips for the Long Haul
Adapt as you go. Got cobwebs in a vaulted ceiling? A broom wrapped in a towel extends your reach. Smudged mid-level mirrors? Windex and a lint-free cloth beat streaks. Pet hair on low carpets? A rubber glove rubbed over it pulls up clumps fast—try it and thank us later. For long-distance movers, this strategy scales: a studio takes a morning, a house takes a weekend. Check X for hacks like “top-down cleaning tricks” to crowdsource shortcuts.
This isn’t just cleaning—it’s a system. Work top-to-bottom, and you’ll dodge rework, impress inspectors, and roll out of your old place with pride. Your new home deserves that fresh-start vibe, and this golden rule delivers it, layer by layer.
Kitchen Deep Clean: The Ultimate Move-Out Makeover
The kitchen isn’t just a room—it’s the battleground of move-out cleaning, especially for long-distance movers. It’s where grease, spills, and forgotten crumbs conspire to sabotage your deposit or a buyer’s impression. A deep clean here isn’t optional; it’s your ticket to a smooth exit. Let’s dive into a detailed, step-by-step guide to transform your kitchen into a pristine showcase, with pro tips to save time and elbow grease.
Appliances: The Big Three
 Start with the heavyweights—your appliances set the tone. For the refrigerator, unplug it for safety, then empty every shelf and drawer. Toss expired ketchup packets and that mystery jar from 2022. Wipe down shelves and bins with a warm, soapy cloth—or a 1:1 vinegar-water mix for odors—then dry them to avoid streaks. Don’t skip the coils (usually at the back or bottom); vacuum or brush off dust to keep it running efficiently for the next occupant. Pull the fridge out if you can—sweep and mop the floor underneath, where crumbs and dust bunnies lurk.
Next, the oven. Grease is the enemy here, so arm yourself with a commercial degreaser or a DIY baking soda paste (mix with water, spread on stains, let sit 20 minutes). Scrub with a non-scratch pad—steel wool can damage finishes—and wipe with a damp cloth. For stubborn spots, repeat and let the paste sit longer; patience beats brute force. Clean the racks too—soak them in soapy water in the sink while you work. A sparkling oven signals care, and landlords notice.
The microwave is a quick win. Fill a bowl with equal parts water and vinegar, zap it for 5 minutes, and let the steam loosen grime. Wipe it down with a microfiber cloth—inside and out, including the handle. Stuck-on splatter? A damp sponge with a drop of dish soap finishes the job. These three appliances are inspection hotspots—nail them, and you’re halfway there.
Cabinets & Countertops: Clear and Conquer
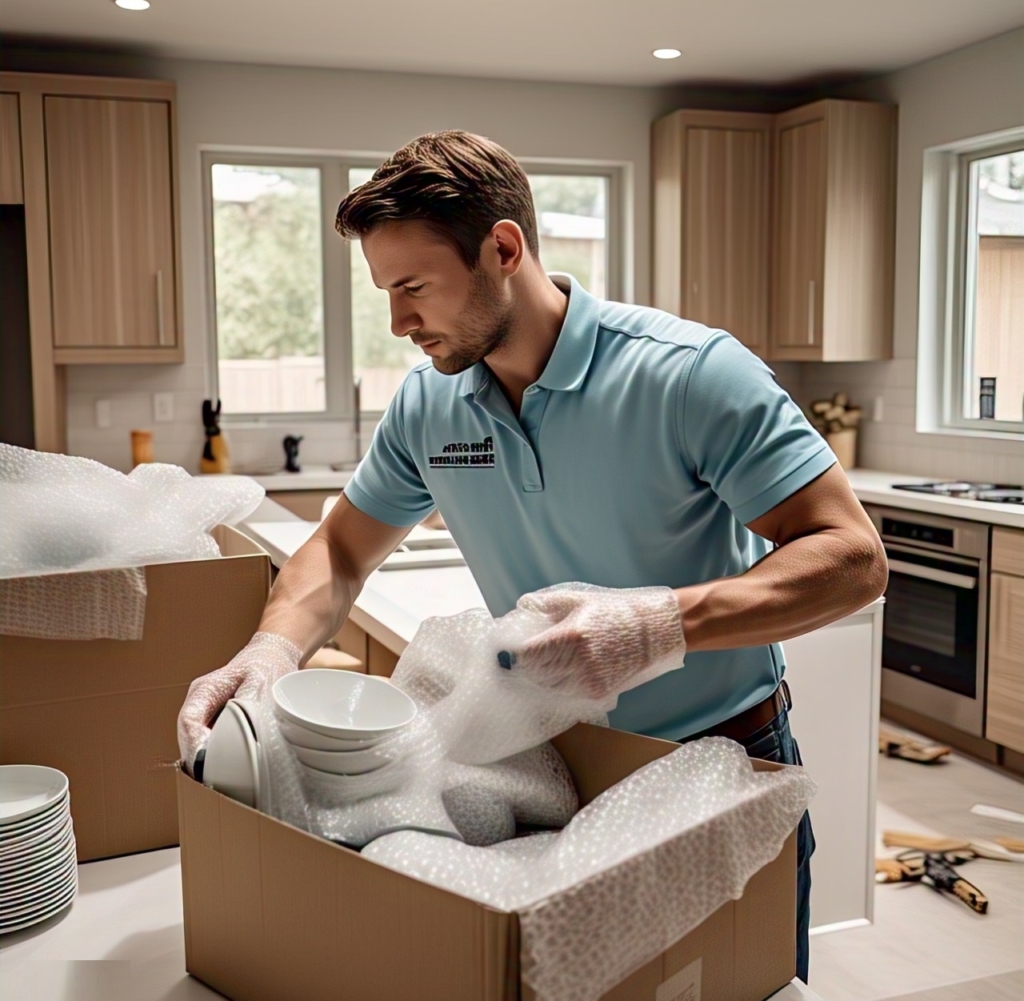
Empty every cabinet and drawer as you pack—don’t leave a stray spice jar behind. Wipe interiors with a damp cloth and mild cleaner; sticky spots from spilled syrup or oil need extra love. Dry them to prevent water marks, then hit the exteriors—fingerprints and smudges show up on glossy finishes. For countertops, clear everything off and scrub with a disinfectant wipe or soapy sponge. Granite or quartz? Check care guides online (search “countertop cleaning by material”)—some need specific cleaners to avoid damage. Pay attention to corners and edges where crumbs hide. A polished counter screams “move-in ready” to buyers or renters alike.
Sink & Faucets: The Finishing Shine
The sink takes a beating, so give it a deep scour. Sprinkle baking soda and scrub with a sponge for porcelain or stainless steel—Bar Keepers Friend is a pro favorite for tougher stains like rust or hard water marks. Rinse thoroughly, then tackle the drain; a quick vinegar pour followed by hot water keeps it fresh. For faucets, wipe with a dry microfiber cloth after cleaning to banish water spots—vinegar-soaked cotton balls dissolve buildup on tricky fixtures. Pull out the stove or fridge if you haven’t yet; the floor behind them often hides a greasy graveyard—sweep, mop, and marvel at the difference.
Why It’s Worth the Sweat
Kitchens are make-or-break territory. A grimy one can cost you hundreds in deposit deductions—landlords zero in on grease stains and crusty appliances—or turn off buyers who’ll lowball their offer. Conversely, a spotless kitchen can clinch a full refund or a glowing review from new tenants. At The Back Saver Movers Blog, we’ve seen meticulous kitchen cleans tip the scales—pros say it’s the room that pays back your effort tenfold. Plus, long-distance moving means you’re not popping back to fix oversights—get it right the first time.
Time-Saving Hacks and Final Touches
Pressed for time? Search “DIY kitchen cleaning hacks” on X or YouTube—steam-cleaning a microwave or using a lemon half on cutting boards can cut corners without cutting quality. Stock up on tools beforehand: a scrub brush, gloves, and a bucket keep you moving. Don’t forget the trash can—empty it, wipe it, and take the bag with you. If you’re flying out, do the bulk early and save a quick sink shine for the end.
This deep clean isn’t just about leaving a good impression—it’s about closing your kitchen chapter with pride. Grease-free, crumb-free, and gleaming, it’s a standout that proves you’re a mover who means business. Your long-distance haul deserves that kind of sendoff—now, make it happen.
Bathroom Sanitization: The Deep Dive for Long-Distance Movers
When it comes to move-out cleaning, the bathroom is a high-stakes zone that demands a meticulous, germ-busting approach. For long-distance movers, leaving this space sparkling isn’t just about courtesy—it’s a financial and reputational lifeline. A grimy toilet or moldy shower can tank your security deposit or sour a buyer’s impression, while a pristine bathroom signals care and competence. Here’s how to sanitize every inch like a pro, with detailed steps and hacks to make it manageable even under moving pressure.
Fixtures: The Core of the Clean
Start with the heavy hitters: the fixtures that see the most action. For the toilet, don’t half-step—sanitize it top to bottom. Pour a generous squirt of toilet bowl cleaner (or vinegar for an eco-option) under the rim and let it sit for 5-10 minutes to break down stains and germs. Scrub the bowl with a stiff brush, hitting the rim and the tricky siphon jet at the bottom—discoloration here is a dead giveaway of neglect. Then, wipe the tank, handle, and base with a disinfectant cloth; bacteria love these overlooked spots. A sparkling toilet is a must—landlords and buyers check it first.
Next, the shower and bathtub. Soap scum and mildew are the enemies here, so arm yourself with vinegar (diluted 1:1 with water) or a heavy-duty cleaner like CLR. Spray generously on walls, doors, and the tub, focusing on seams where grime hides. Let it sit for 10 minutes, then scrub with a sponge or brush—nylon bristles tackle buildup without scratching. For glass doors, a squeegee after wiping prevents streaks; for tubs, rinse and dry with a microfiber cloth. Hard water stains? Soak a rag in vinegar, press it against the spot for 15 minutes, then scrub. Pull the shower curtain if it’s yours—wash it or toss it if it’s moldy. This is deep-clean territory—half-measures won’t cut it.
Surfaces: Polish to Perfection
Move to the mirrors and counters, where clarity and shine matter. For mirrors, use a glass cleaner (Windex or a vinegar-water mix) and a lint-free cloth—wipe in circles to avoid streaks, and don’t skip edges where dust collects. Counters and sinks come next—clear off any leftover toiletries, then wipe with a disinfectant spray or soapy cloth. Focus on corners and faucet bases; toothpaste splatter and hair cling here. Polish faucets with a dry microfiber cloth for a gleaming finish—vinegar-soaked cotton balls can dissolve mineral buildup on tricky spots. If there’s a soap dish or toothbrush holder staying, scrub it too. These surfaces are the bathroom’s face—make them flawless.
Grout & Tile: The Gritty Details
Grout and tile are where bathrooms betray their age—and your effort. Mix a paste of baking soda and water (or grab a grout cleaner—search “best grout cleaners” for top-rated picks like Zep or Black Diamond) and apply it with an old toothbrush. Scrub hard along grout lines; mildew and stains need persistence, not just elbow grease. For tiles, spray with your shower cleaner and wipe down—don’t let soap film linger. Rinse thoroughly, then dry with a towel to prevent water spots. Got a stubborn stain? Hydrogen peroxide on a cotton pad, left for 10 minutes, can lift it without bleaching the grout. This step’s a grind, but it’s a deposit-saver—grubby grout screams “skip the refund.”
Ventilation: The Hidden Hero
Don’t overlook ventilation. Bathroom fans and vents trap dust and mold spores, so unscrew the cover if you can (a stepladder helps) and vacuum the gunk with a brush attachment. Wipe the cover with a damp cloth and disinfectant, then reattach. No access? At least run the fan while cleaning to clear humidity—mold thrives in dampness. A clean vent isn’t flashy, but it’s a subtle win that pros notice.
Why It’s a Big Deal—and How to Nail It
Bathrooms are non-negotiable for long-distance movers because they’re germ central. Mold, mildew, or a funky toilet can nix your deposit faster than a spilled paint can—landlords and buyers see it as a health hazard. At The Back Saver Movers Blog, we’ve seen sanitized bathrooms turn tense handovers into smooth sailing. Time tight? Prioritize fixtures and grout—those are the dealbreakers. Stock up on gloves, a scrub brush, and a bucket; search X for “bathroom cleaning hacks” like using a pumice stone on toilet rings or a dryer sheet on mirrors.
This isn’t just cleaning—it’s sanitizing like your peace of mind depends on it. A bathroom that gleams lets you walk away confident, deposit in hand, ready for the long road ahead. Get it done right, and leave no trace—except a spotless legacy.
Living Areas and Bedrooms
 Maintaining pristine living areas and bedrooms is essential for creating a comfortable, welcoming home. These spaces see daily use, so keeping them clean requires consistent effort and the right techniques. Let’s break it down into dusting, floors, and those often-overlooked details to ensure your rooms stay spotless.
Dusting: Dust accumulates fast on surfaces like shelves, tables, and electronics, dulling their appearance. A microfiber cloth is your best friend here—it traps dust effectively without spreading it around. Start high, wiping down bookshelves or entertainment centers, and work your way to lower surfaces like coffee tables. For electronics, use a dry microfiber cloth to avoid moisture damage, gently clearing dust from screens and crevices. Regular dusting not only keeps things looking sharp but also improves air quality—crucial in rooms where you relax or sleep.
Floors: Floors take a beating, especially in high-traffic living areas or bedrooms with kids and pets. For carpets, vacuuming is non-negotiable. Make a double pass over busy spots like near doorways or in front of the couch to lift embedded dirt. If you’re moving long-distance, a thorough vacuum can make a rental or new home feel fresh—search “best vacuums for moving” if pet hair’s an issue; you’ll need power. Hardwood floors demand a different approach. Mop with a cleaner compatible with your finish—check the label to avoid streaks or damage. Too much water can warp wood, so use a damp mop and dry immediately. Clean floors set the tone for the whole space.
Details: Don’t skip the small stuff. Baseboards and windowsills collect grime fast—wipe them with a damp cloth to banish dust and smudges. These touches elevate a room from “clean enough” to pristine. Long-distance moving highlights this: spotless details impress new occupants or landlords. At The Back Saver Movers Blog, we’ve seen it firsthand—details matter. Whether settling in or maintaining your space, a little effort here goes a long way. Keep it consistent, and your living areas and bedrooms will shine.
Garage and Outdoor Areas
When it comes to wrapping up your home maintenance, the garage and outdoor areas deserve just as much attention as the indoors. These spaces are the first impression of your property—whether you’re staying put or prepping for a long-distance move. Finishing strong outside means tackling the garage and sprucing up the exterior with practical, straightforward steps. Let’s dive into the specifics.
Garage: Start with the floor—it’s a magnet for dirt, grease, and grime. Grab a sturdy broom and sweep out dust, leaves, and whatever else has tracked in. For those stubborn oil stains from a leaky car, cat litter is a game-changer. Sprinkle it over the spill, let it sit to absorb the oil, then sweep it away. It’s cheap, effective, and beats scrubbing endlessly. If you’ve got shelves or workbenches, clear off clutter while you’re at it—old paint cans or rusty tools can pile up fast. A clean garage not only looks good but also makes packing or unpacking during a move way easier. Search “garage cleaning tricks” online if you need extra hacks, like using a leaf blower for quick dust removal. At The Back Saver Movers Blog, we’ve seen how a tidy garage seals the deal for a smooth transition.
Outdoors: Head outside and tackle the yard and entryways. Clear debris—leaves, twigs, and stray trash— from lawns, flower beds, and corners where wind likes to dump stuff. A rake or blower works wonders here. Next, sweep walkways and patios; a quick pass with a broom keeps them sharp and slip-free. Don’t forget the house itself—grab a long-handled brush or broom and knock down cobwebs from eaves, corners, and around doors. These small efforts boost curb appeal, which matters whether you’re impressing neighbors or potential buyers. Long-distance moving pros swear by this: a clean exterior signals a well-kept home. Sweep your way to a great exit—or a fresh start. It’s simple, but the payoff is huge. Keep it up, and your outdoor spaces will stand out for all the right reasons.
Don’t Forget the Details
When it comes to cleaning—whether you’re sprucing up your home for yourself, preparing for a move, or settling into a new space—the details are what transform a good clean into a great one. It’s easy to focus on the big stuff: vacuuming the carpets, mopping the floors, or wiping down countertops. But it’s the small, often-overlooked touches that truly elevate your space and leave it feeling refreshed and polished. At The Back Saver Movers Blog, we’re all about helping you dazzle with those finishing flourishes—especially if you’re a long-distance mover looking to make your new place yours. Let’s dive into some key areas where attention to detail pays off.
Air Filters: Replace—fresh air matters.
You might not see it, but the air quality in your home affects how it feels—and how you feel in it. Air filters trap dust, pet dander, and allergens, but over time, they clog up and stop doing their job. A dirty filter doesn’t just mean stale air; it can strain your HVAC system, driving up energy costs. Replacing them is a quick win—pop out the old, slide in the new, and breathe easier. For movers, this is a must-do when you arrive at your new digs. Check the filter’s condition (most need swapping every 1-3 months, depending on use) and start fresh. It’s a small step that makes a big difference.
Switches & Outlets: Wipe—grime builds up.
Light switches and electrical outlets are high-touch spots that collect fingerprints, smudges, and grease faster than you’d think—especially in kitchens or entryways. A damp microfiber cloth with a dab of all-purpose cleaner can cut through the grime in seconds. Avoid soaking them (safety first!), and dry them off afterward. This tiny task brightens up a room and shows you’ve got an eye for detail. For renters or movers handing off a space, it’s a subtle signal you’ve cared for the place.
Walls: Magic eraser for scuffs.
Walls take a beating—scuff marks from shoes, crayon masterpieces from kids, or mysterious smudges that defy explanation. A magic eraser is your secret weapon here. Dampen it lightly, rub gently, and watch those marks vanish. For tougher stains, search “cleaning wall marks” online for pro tips—baking soda paste or vinegar solutions can tackle grease or ink. Just test a small spot first to avoid damaging paint. Clean walls make a space feel crisp and new, a detail that dazzles whether you’re staying or staging for a sale.
Light Fixtures: Remove dust and bugs from inside the light fixtures.
Ever notice how a dusty light fixture dims the glow of a room? Or worse, those little bug carcasses that somehow end up inside? Take five minutes to unscrew the covers, dump out debris, and wipe them down with a cloth. Use a mild soap solution for glass or plastic parts, and dry them thoroughly before reassembling. It’s a chore most skip, but the payoff is instant—brighter, cleaner light that makes your space shine. For long-distance movers, this is your edge: arrive, clean the fixtures, and claim the space as yours.
Details like these aren’t just about cleanliness—they’re about ownership. They show you’ve gone the extra mile, whether you’re settling in or moving out. At The Back Saver Movers Blog, we believe it’s these little efforts that dazzle, turning a house into a home—or leaving a lasting impression behind. So grab your magic eraser, swap that filter, and get wiping. Your space deserves it.
Final Walk-Through
The final walk-through is your last chance to ensure everything’s in order before you hand over the keys or settle into your new space. Whether you’re a long-distance mover wrapping up a clean or a homeowner tying up loose ends, this step is about precision. It’s not just a quick glance—it’s a deliberate double-check to confirm you’ve left no trace behind or that your new place meets your standards. At The Back Saver Movers Blog, we’re here to guide you through it with a checklist that wins every time. Let’s break it down.
Checklist: Confirm every task.
Start with a list—mental or written—and tick off every cleaning task you set out to do. Floors swept? Check. Countertops wiped? Check. Trash emptied? Check. This isn’t about guesswork; it’s about certainty. Walk room by room, from the attic to the basement, and verify nothing’s been overlooked. For movers, this is clutch—landlords or buyers will notice if you skimped. A solid checklist keeps you accountable and ensures you’re not scrambling at the last second.
Spots: Fix missed areas—mirrors, corners.
It’s the little spots that trip people up. Streaks on mirrors, dust bunnies in corners, or cobwebs in high places can undo all your hard work. Grab a microfiber cloth for mirrors (a splash of vinegar works wonders), and use a broom or vacuum extension for those sneaky corners. Don’t rush—slow down and scan each room like a detective. Fixing these missed areas polishes your clean to perfection.
Smell Test: Make sure the house smells clean and fresh.
A clean house should smell like it. Open the windows to air it out, and sniff for trouble—mildew in the bathroom, stale odors in the kitchen, or lingering pet scents. Baking soda in trash cans or a quick simmer of lemon and herbs on the stove can neutralize and refresh. For long-distance movers, this seals the deal—nobody wants to inherit a funky vibe.
Take Photos: Document the clean condition for your records.
Snap pictures of every room—wide shots and close-ups of key areas like the kitchen and bathroom. This isn’t just for pride; it’s proof. If you’re moving out, photos protect you from disputes over cleaning fees or damage claims. Moving in? They establish a baseline. Store them digitally with timestamps—easy insurance for peace of mind.
The final walk-through isn’t optional—it’s your victory lap. Long-distance movers, this is where you shine, leaving no trace and starting fresh. At The Back Saver Movers Blog, we say: walk through, double-check, and win. You’ve got this.
The Power of a Pristine Exit
Move-out cleaning is your secret weapon in the moving process. It’s a powerful tool that can save you money, earn you respect, and provide a sense of closure as you embark on your new journey. By following the expert advice from The Back Saver Movers Blog, you’ve equipped yourself with the knowledge to transform your old home into a gleaming testament to your care and responsibility.
Mastering the Move-Out Clean
Let’s recap the key strategies we’ve explored:
- Planning is paramount: A well-structured cleaning plan is your roadmap to success.
- Declutter with purpose: Lighten your load and simplify your cleaning process.
- Top-to-bottom approach: Tackle your space systematically for maximum efficiency.
- Detail-oriented mindset: Pay attention to the little things that make a big difference.
- DIY vs. Professional help: Choose the option that best fits your situation and budget.
By implementing these pro tips, you’re not just cleaning—you’re orchestrating a move-out masterpiece.
Beyond Clean: The Psychological Benefits
A thorough move-out clean does more than just satisfy your landlord or impress potential buyers. It provides a sense of closure, allowing you to mentally and emotionally prepare for your new chapter. As you scrub, dust, and polish, you’re not just cleaning a space—you’re clearing your mind for the exciting journey ahead.
Your Long-Distance Moving Triumph
Long-distance moving is undoubtedly a significant undertaking, filled with challenges and complexities. However, by prioritizing your move-out cleaning, you’re setting yourself up for success from the very start. A spotless exit from your old home creates positive momentum that can carry you through the entire moving process.
The Time to Act is Now
Don’t wait until the last minute to begin your move-out cleaning odyssey. Start planning and preparing now, and you’ll reap the rewards of a stress-free, efficient, and triumphant move. Remember, every sweep of the broom and wipe of the cloth brings you one step closer to your fresh start.
Move-out cleaning is your secret weapon in the moving process. It’s a powerful tool that can save you money, earn you respect, and provide a sense of closure as you embark on your new journey. By following the expert advice from The Back Saver Movers Blog, you’ve equipped yourself with the knowledge to transform your old home into a gleaming testament to your care and responsibility.
Mastering the Move-Out Clean
Let’s recap the key strategies we’ve explored:
- Planning is paramount: A well-structured cleaning plan is your roadmap to success.
- Declutter with purpose: Lighten your load and simplify your cleaning process.
- Top-to-bottom approach: Tackle your space systematically for maximum efficiency.
- Detail-oriented mindset: Pay attention to the little things that make a big difference.
- DIY vs. Professional help: Choose the option that best fits your situation and budget.

By implementing these pro tips, you’re not just cleaning—you’re orchestrating a move-out masterpiece.
Beyond Clean: The Psychological Benefits
A thorough move-out clean does more than just satisfy your landlord or impress potential buyers. It provides a sense of closure, allowing you to mentally and emotionally prepare for your new chapter. As you scrub, dust, and polish, you’re not just cleaning a space—you’re clearing your mind for the exciting journey ahead.
Your Long-Distance Moving Triumph
Long-distance moving is undoubtedly a significant undertaking, filled with challenges and complexities. However, by prioritizing your move-out cleaning, you’re setting yourself up for success from the very start. A spotless exit from your old home creates positive momentum that can carry you through the entire moving process.
The Time to Act is Now
Don’t wait until the last minute to begin your move-out cleaning odyssey. Start planning and preparing now, and you’ll reap the rewards of a stress-free, efficient, and triumphant move. Remember, every sweep of the broom and wipe of the cloth brings you one step closer to your fresh start.
In conclusion, move-out cleaning is your opportunity to leave a lasting positive impression and set the tone for your entire relocation experience. By embracing this task with enthusiasm and dedication, you’re not just cleaning a house—you’re paving the way for a smooth transition to your new home and life. So roll up your sleeves, gather your supplies, and turn your move into the triumph it deserves to be.